
HOW TO FIX CRACKS IN DRYWALL
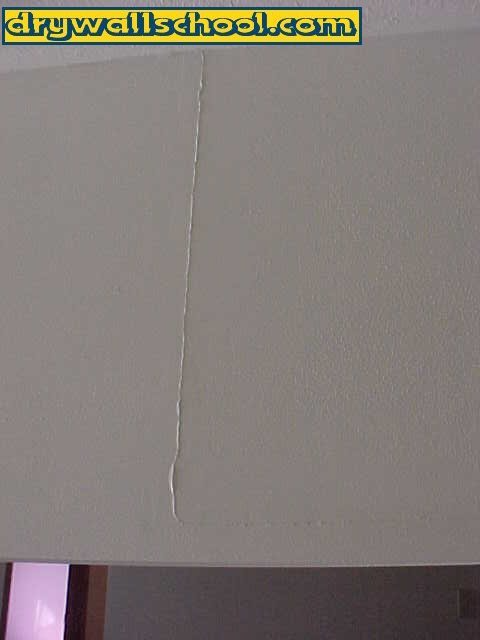
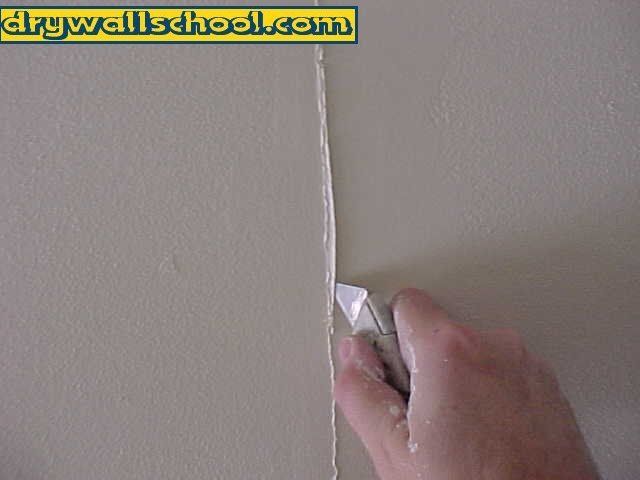
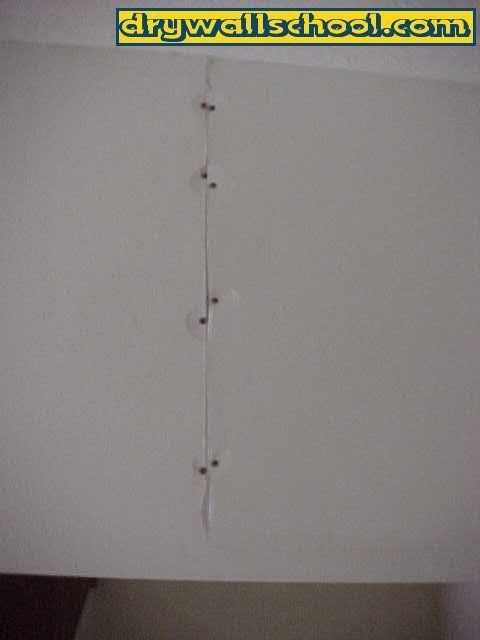
After you cut a nice groove and cleaned the crack out it should look like the picture below.


WAIT A SEC, WHY DO CRACKS KEEP COMING BACK?
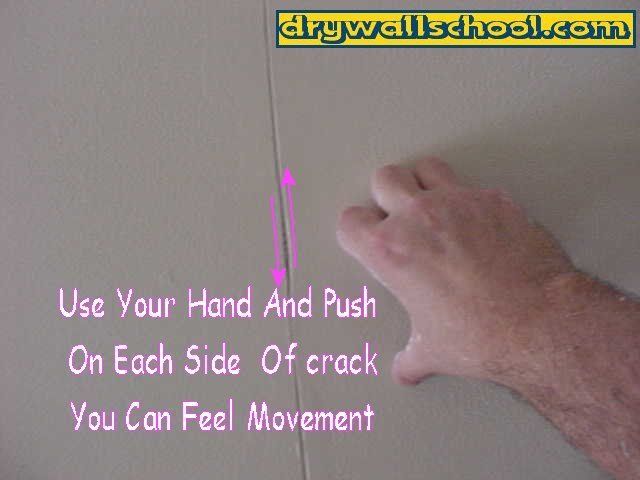
This is very important: The reason cracks always come back is because there is movement where the crack is. That's why the crack is there in the 1st place. What you have to do is tighten the area up so the joint is not floppin' around.
If you take your hand and push on each side of the crack, you will see and feel movement.
STEP 2
Take a hammer and some nails and re-nail the bad area on each side of the crack. Make sure you hit solid wood. You can use screws if you'd like.
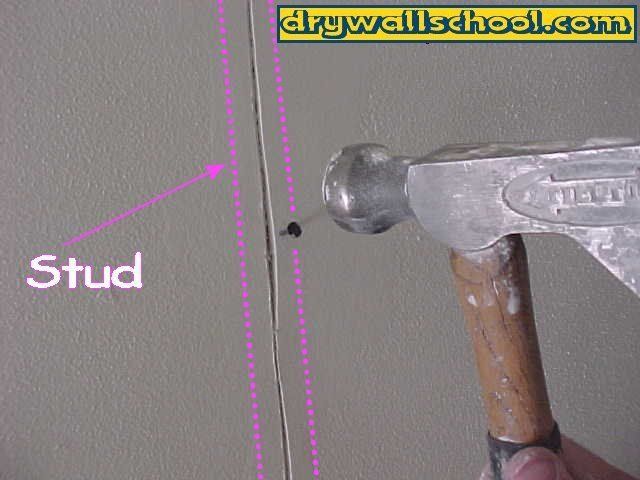

Now the crack is all tightened up, no movement at all.
STEP 3
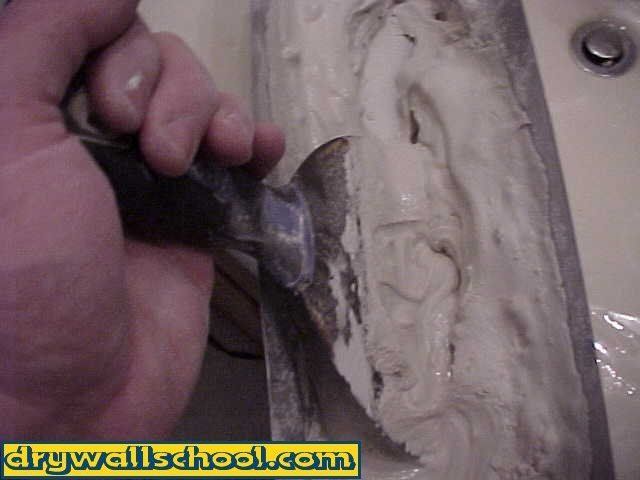
Apply Tape: I do this for a living so in order to make money, I have to go fast.. I am going to be using mesh tape and "Hot Mud" for the 1st coat.
If you're scared of the hot mud, you can use regular all purpose joint compound and paper drywall tape. To learn about how to tape with regular mud and paper tape go here How to hand tape If you do use regular mud along with paper tape you must wait 24 hours before you can 1st coat, then another 24 hours before you can 2nd coat.
If you decide to use the mesh tape, make sure to use hot mud. If you need to know more about different types of mud (joint compound) click here All about Joint Compound
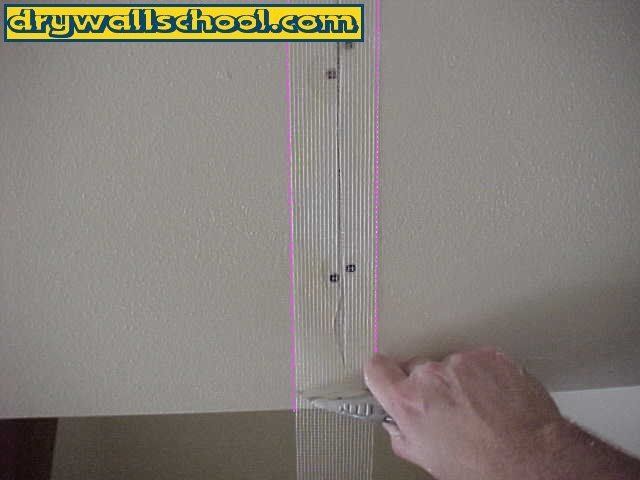
Stick on the mesh tape, you can see by the pictures how to apply the tape.

STEP 4
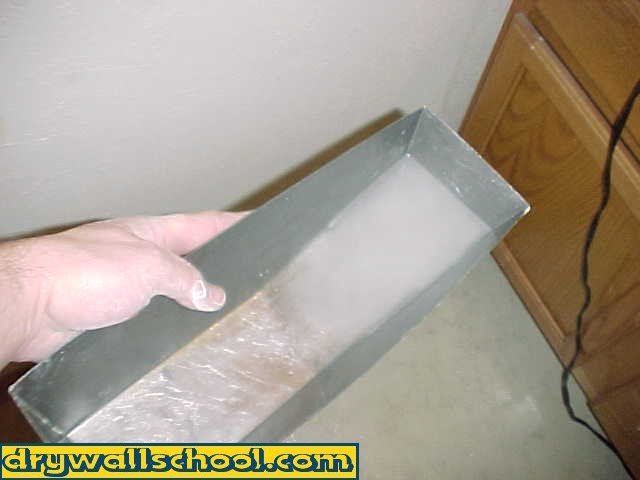
Mix Mud: When you're using hot mud, it's good to know the best way to mix it. Pour a little water in your drywall pan 1st. Now slowly pour in a small amount of hot mud powder. Keep stirring up the mud using a 6 inch drywall knife. This takes a little practice. If it gets too thick ad a little water, too thin ad a little powder. When you get it nice and smooth you are ready to do some coating. In my patch, I'm using "20 minute" mud which means it starts setting up in 15-20 minutes. If you decide to use 20, don't waste too much time mixing it up. You can buy all different speeds (drying times) of hot mud, any where from 5 to 210 minute.


STEP 5
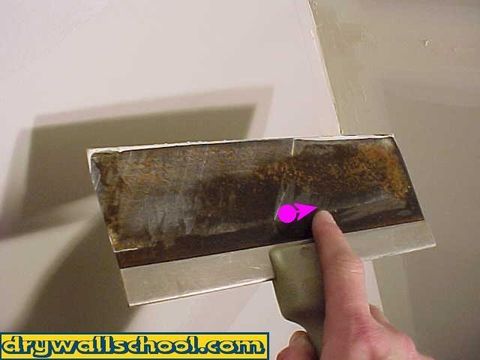
Start the 1st coat: Using a 10 inch taping knife apply the 1st coat on the cracked area (from here out we'll call it a patch). It's hard for me to explain how to coat (but I'll try). Spread on a nice bed of mud on each side of the tape. Always keep your pointer finger in the center of the knife (Look at picture). Since I made this page I have made another page about
how to 1st and 2nd coat butt joints <--click it
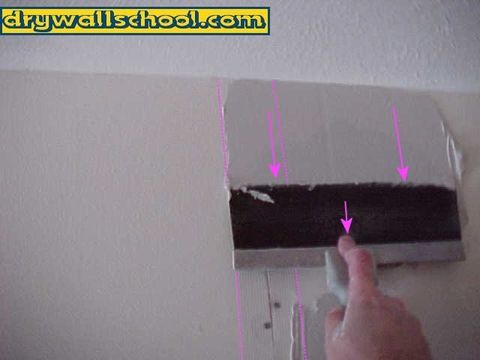

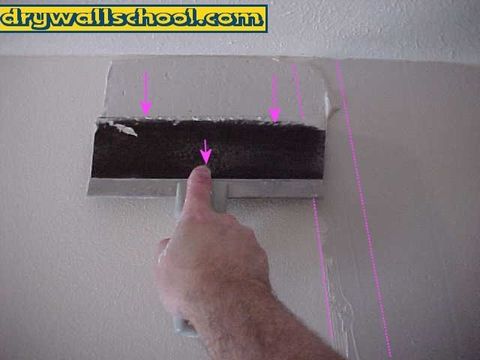
Wipe down the center: Move your finger to the center and wipe straight down the center of the patch applying nice even pressure.


Feather in outside edges: Moving your finger a little right of center feather in the right side of the patch. Now move your finger a little left and feather in the opposite side. You should be leaving a nice ripple line on each side. (Look at pictures)

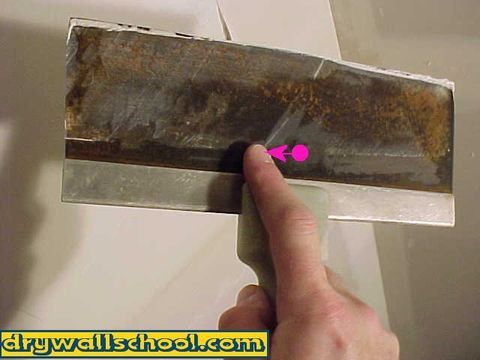

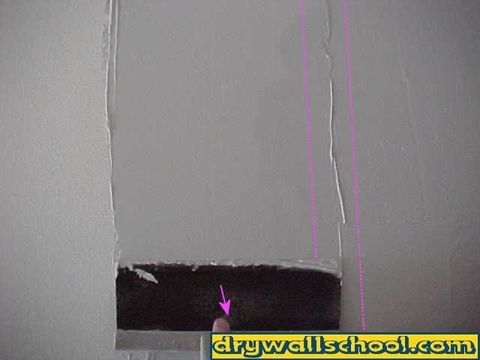
Now your patch is 1st coated and should look something like the picture below. If you used paper tape and regular mud, let patch dry overnight before applying 2nd coat. I used 20 minute hot mud so I'll wait about a half hour before the 2nd coat.

STEP 6
Scrape off any edges: Okay, it's been about 25 minutes. I just mixed up some regular joint compound to use for the 2nd coat. If you need to know how to mix up mud, you can go back to
Start off by lightly scraping off any edges and high spots from the 1st coat. You don't need to sand anything on this coat.
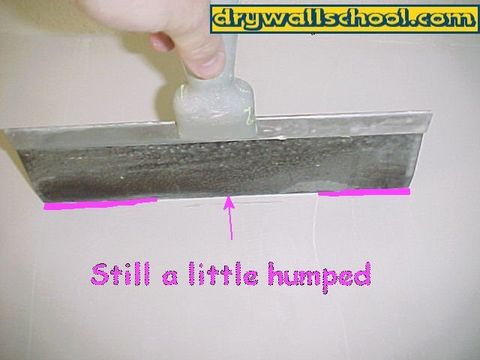
Each project will be different. What you want to do is figure out what the patch needs. Take your 12 inch taping knife and put it on the center of the patch. See if the knife rocks back in forth or if there is kind of a hollow spot. If it looks like it's still humped (Like picture below), you need to build up each side with the 2nd coat. If it looks like it's hollow, you need to fill in the middle area.
STEP 7
2nd coat: My patch is still humped so I'm going to build up each side with mud.
I really don't want to have to add a bunch more picture so please just go back to STEP 5 and do the same exact thing all over again, only this time use a 12 inch knife. Try your best to smooth it out. Don't worry if you can't get it perfect. You can sand it down a little tomorrow.
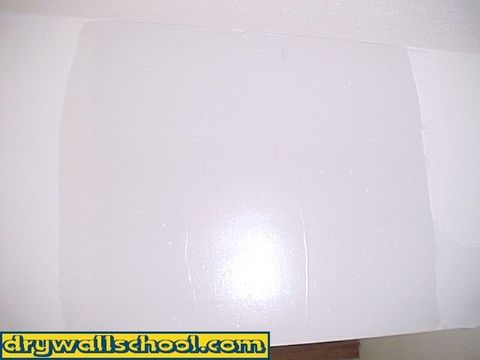
The picture below on the right is my patch after it's 2nd coat,
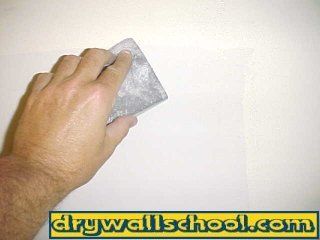
STEP 8
you're coming down the home stretch. Time to make your patch perfect. You can see by the picture, I am using a sanding block (Full Circle International). You can use a sanding pole, a piece of sand paper, a wet rag or a sponge . Lightly sand patch down so it's nice and smooth. It's very important to feather and blend the outside edges . You don't want any sharp lines where the patch meets the existing wall. For a professional patch job, you must "KILL THE OUTSIDE EDGE" !!
Good Job, you're ready for the final step.
FINAL STEP
Now the patch is smooth and edge free. I'm using a roller to apply my primer. On my patch, I have to match the existing sand texture so I'm using perlite (primer with sand mixed in). Your patch might be smooth so just use regular primer. After the primer is dry, you are ready for the final paint job. You can handle that without me...


DONE!
For questions or ideas for future pro Drywall Tips, click here Mike@mikebelldrywall.com You can also find some good drywall tips in the "ASK THE PRO" section
Drywallschool.com grants you permission to view this Site and to print individual pages from this Site for your own personal, noncommercial use, provided that you agree to and accept without modification the notices, terms and conditions set forth in this agreement. You may not modify, copy (except as set forth in the preceding sentence), distribute, transmit, display, perform, reproduce, publish, license, create derivative works from, transfer or sell any information, material, software, products or services from this Site.