
HOW TO PATCH, REPAIR A LARGE HOLE IN DRYWALL
Okay, There are many different ways of patching a big hole in damaged sheet rock. I want this patch to be complete in 2 trips so I'm going to be using "Hot Mud". (I'll explain as I go)
I'll show you step by step my way to patch large holes.
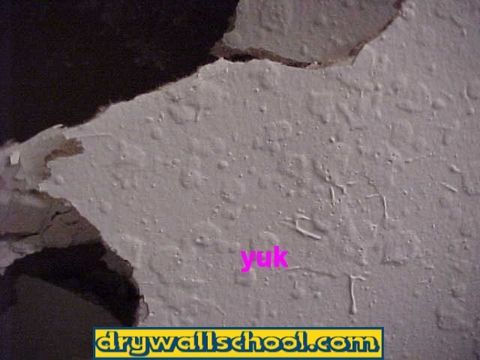
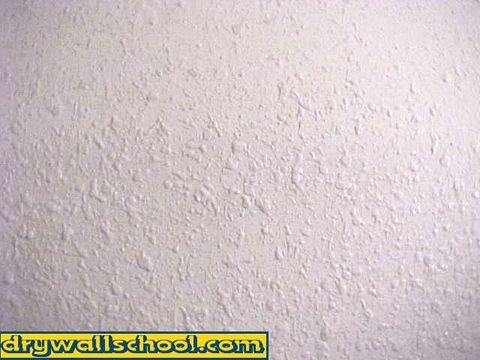
Note about texture: Later in the project we will have to try and match this texture. It's too thick really to be called an orange peel. It looks like a knock down that never really got knocked down. Anyhow, we will try to make our texture match. We will call it a "splatter"
To see pictures of various drywall textures click here
STEP 1
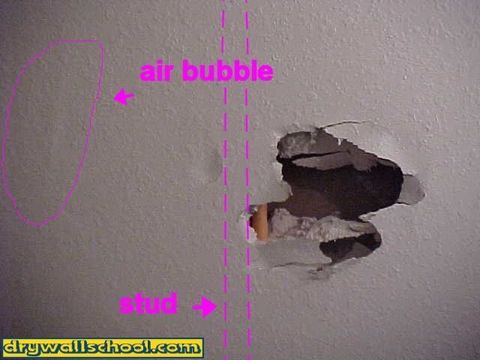
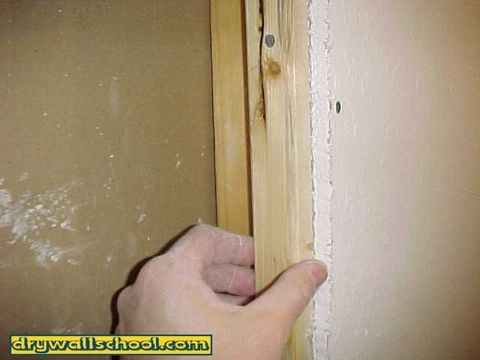
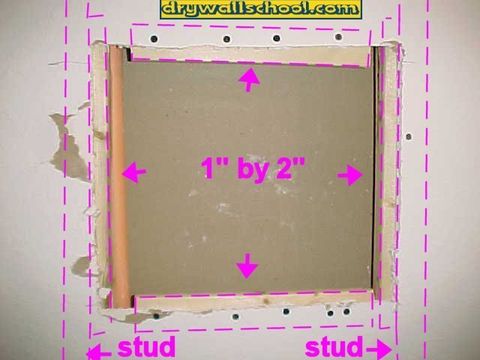
If you look at the picture below, to the left of the big hole you can see an air bubble deal. Fixing that is not part of my deal with the home owner but, I'm going to do it anyway. The 1st thing you want to do is square the hole up using a keyhole saw. There are 2 ways of going about this. Some people like to cut the sheet rock back to the middle of the closest stud using a router or utility knife. I like to saw mine flush with the edge of the stud and nail on some 1" by 2" chunks of wood. For me it's the fastest way.

STEP 2
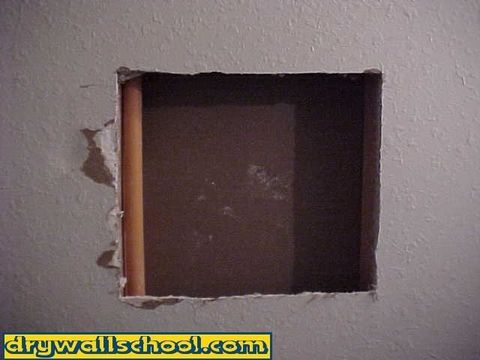
After you get the hole squared up you need to nail or screw on your backing material. For the top and bottom you will need to hold the board in place with one hand while you screw with the other. Watch out for your fingers.
STEP 3 & 4
Now cut and hang your patch piece of sheet rock. You can see by the picture below, not only did I screw the patch piece real good, I also screwed the area around the patch. This way everything is good and tight and the patch will not crack. I also dug out the bad air bubble on the left. I do this for a living so in order to make money, I have to go fast.. I am going to be using mesh tape and "Hot Mud" for the 1st coat.
If you're scared of hot mud, you can use regular all purpose joint compound and paper drywall tape. To learn about how to tape with regular mud and paper tape go here How to hand tape If you do use regular mud and paper tape you must wait 24 hours before you can 1st coat, then another 24 hours before you can 2nd coat.
If you decide to use the mesh tape, make sure to use hot mud. If you want to know more about different types of mud (joint compound) click here All about Joint Compound
Stick on the mesh tape, you can see by the pictures how and where to apply the tape.


STEP 5
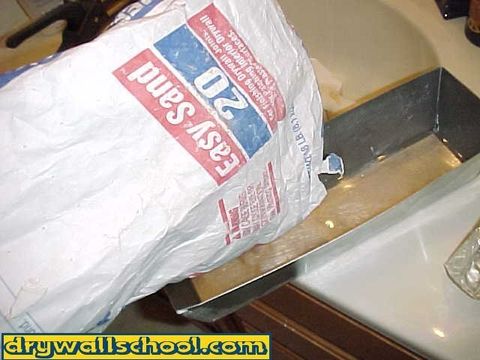
When you're using hot mud, it's good to know the best way to mix it. Pour a little water in your drywall pan 1st. Now slowly pour in a small amount of hot mud powder. Keep stirring up the mud using a 6 inch drywall knife. This takes a little practice. If it gets too thick add a little water, too thin add a little powder. When you get it nice and smooth you are ready to do some coating. On my patch, I'm using "20 minute" mud which means it starts setting up in 15-20 minutes. If you decide to use 20, don't waste too much time mixing it up. You can buy all different speeds (drying times) of hot mud, from 5 to 210 minute.

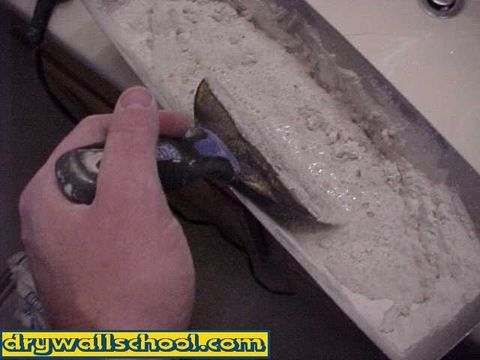
STEP 6
Using a 10 inch taping knife apply the 1st coat on your patch area. It's just too hard for me to explain how to coat. Just try to get the mud as even as possible. Always keep your pointing finger in the center of the knife (Look at picture). Feather in the outside edges by applying more force on the outside edge of the knife. Don't worry if you leave a few knife lines on the patch. It's only the 1st coat.
Now wait... This is a good time to clean your tools.
STEP 7
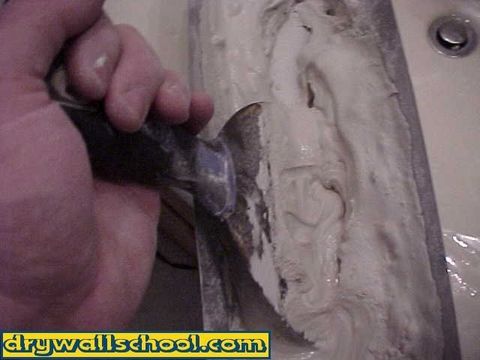
Okay, it's been about 25 minutes. I just mixed up some regular joint compound to use for the 2nd coat. If you need to know how to mix up mud, you can go back to
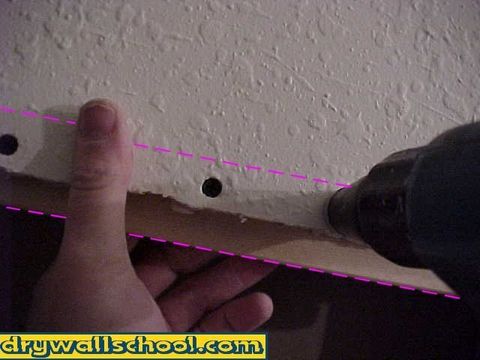
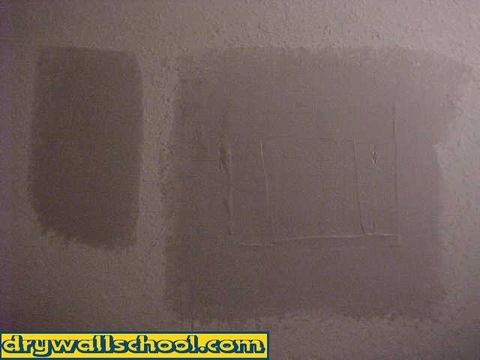
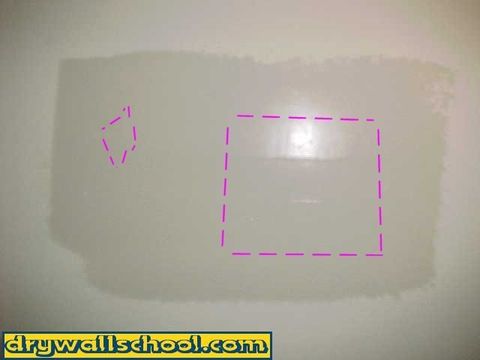
Start off by lightly scraping off any edges and high spots from the 1st coat. You don't need to sand anything on this coat. Now using a 12" knife, 2nd coat your patch. Try your best, this is the money coat. Get the mud as even as possible. Always keep your pointer finger in the centre of the knife (Look at picture). Feather in the outside edges by applying more force on the outside edge of the knife. You want your 2nd coat to be wider then the 1st coat. See how the 2 small patches turned into 1 big patch? You can see by the pink dotted lines where the original patches were. Don't worry if you leave a few knife lines, we can sand them off tomorrow. That's it for today, let it dry overnight.

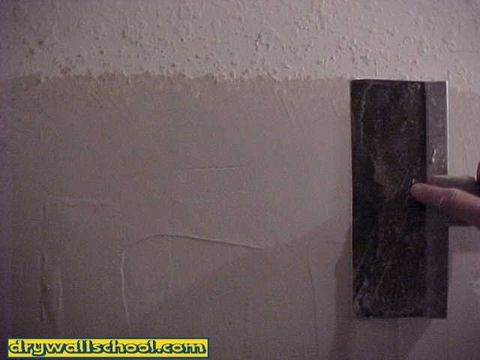
STEP 8
Here is a picture of our dry patch the next day. You can see by the picture, I am using
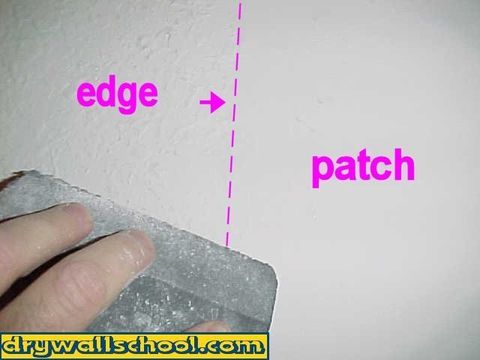
a sanding sponge. You can use a piece of sand paper, a wet rag or a sponge. Lightly sand patch down so it's nice and smooth. It's very important to feather and blend the outside edges. You don't want any sharp lines where the patch meets the existing wall. For a professional patch job, you need to "KILL THE OUTSIDE EDGE"

STEP 9
If your patch is smooth, you are ready for primer and paint. If your patch needs to be textured it should be ready to go. Our patch gets a heavy orange peel. If you want to know how to do a knockdown or orange peel click here.
How To Do A Knockdown(Skip Trowel) & Orange Peel Texture
Below you can see a picture of the patch right after the texture has been applied. The other picture is the complete painted patch.

Done!