
HOW TO PATCH, REPAIR A SMALL HOLE IN DRYWALL
Okay, There are many different ways of patching a small hole in damaged sheetrock. I'm trying to keep this simple so I'll show you how to do it using regular joint compound. If you're comfortable using a quick set joint compound (HotMud) you can save yourself a few days of wait time.
I will show you step by step what I feel is the best way. You won't need to screw in backing boards or use special clips. You won't even need drywall tape. "This is Awesome!!
This method is known as "The Dutchman" or "Fly Patch"
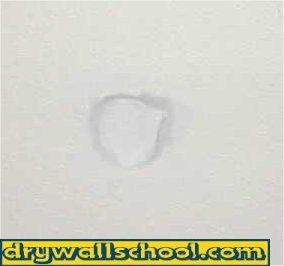
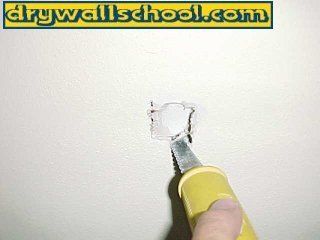
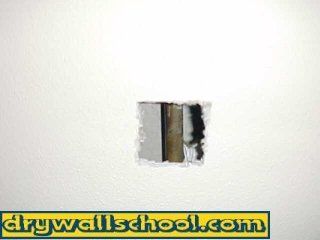
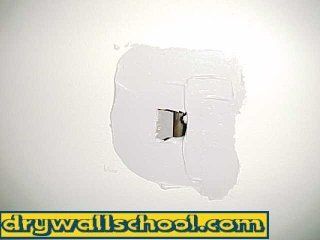
STEP 1
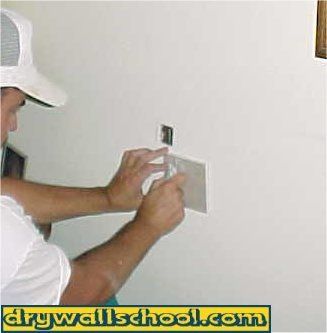
Using a drywall saw (In a pinch a steak knife will do), cut hole the shape of a square. Just eyeball it.
STEP 2
Once you have the hole somewhat square, take a utility knife and cut a piece of sheetrock. You want your patch piece to be bigger then the hole. I like to leave 1 to 2 inches all the way around the hole (Look at picture). Now flip the sheetrock over so the white side (finished side) is facing the wall.
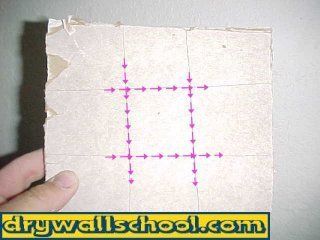
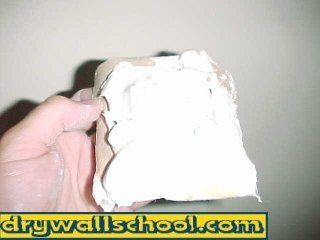
STEP 3
Using the hole as your reference, Take your utility knife and score the back side of the sheetrock like you were playing tic tac toe. Again, just eyeball it. You want the middle piece just a little smaller then the hole. Now carefully snap the rock and peel off the back pieces leaving the face paper intact. Leave the center piece of sheetrock attached.

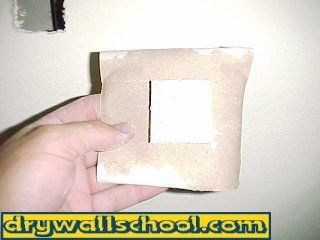
STEP 4
When you're finished it should look something like this (Left picture below). Now put the patch piece in hole and see if you have a nice fit. A little sloppy is okay. If it's too tight you might have to make the hole a little bigger or you can always just start over with another piece of sheetrock. Don't force it, if it's too tight..
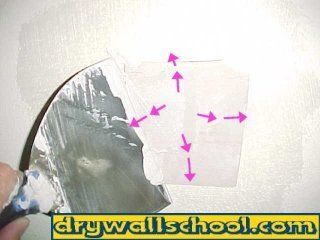
STEP 5
Now we get to start mudding. Mix up some all purpose joint compound. A rookies biggest mistake is trying to use mud straight from the bucket. Add a little water and thin the mud down. This way it is much easier to work with. There is a saying among drywall finishers, "You work the mud, don't let the mud work you" Not too thin. Smooth like pudding. Now using a 6 inch taping knife apply a generous bed of mud on patch area. Now butter up the back side of the patch. Don't be stingy with the mud. This is critical, any area without mud is a future air bubble and the patch will never be right.
STEP 6
Place buttered up patch into the thick bed of mud (Look at picture). You can see there is no chance of any air bubbles ruining my patch. Now take your taping knife and wipe patch smooth. Pull from inside working out. Don't play with it too much, just a few swipes to pull the excess mud out. 1 stroke down, one right, one left and one up..Done. Now let patch dry overnight.

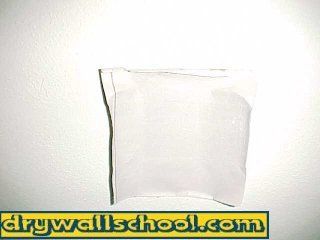
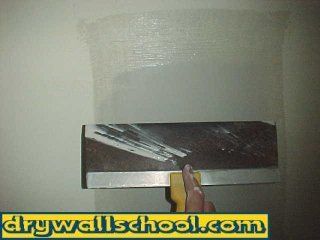
STEP 7
The next day your patch should look something like this. Time to get out your mud. Using a 10 inch taping knife apply a nice even coat. If you can't get it just right don't worry, you can always sand it down a little tomorrow. You have just 1st coated your patch. Lookin' Good !! Now let it dry another day.


STEP 8
My patch looks great, no need to sand at all. Yours on the other hand might need a little help. Knock off the high spots using a piece of sand paper or a sanding block. Now get out your mud, take a 12 inch taping knife and apply your final coat. This is the most important coat so try to do your best. There you go, you just 2nd coated your patch. See you tomorrow.
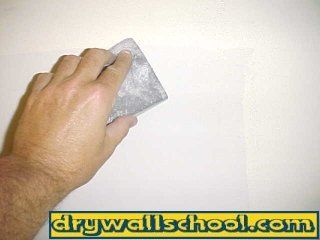
STEP 9
You're coming down the home stretch. Time to make your patch perfect. You can see by the picture, I am using a sanding block (Full Circle International). You can use a piece of sand paper, a wet rag or a sponge . Lightly sand patch down so it's nice and smooth. It's very important to feather and blend the outside edges . You don't want any sharp lines where the patch meets the existing wall. For a professional patch job, you must "KILL THE OUTSIDE EDGE" !!
Good Job, you're ready for the final step
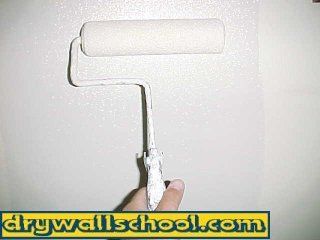
FINAL STEP
Now the patch is smooth and edge free. I'm using a roller to apply my primer. On my patch, I have to match the existing sand texture so I'm using perlite (primer with sand mixed in). Your patch might be smooth so just use regular primer. After the primer is dry, you are ready for the final paint job. You can handle that without me...

More Pro Drywall Tips Coming Soon
For questions or ideas for future pro Drywall Tips, click here Mike@mikebelldrywall.com You can also find some good drywall tips in the "ASK THE PRO" section