
HOW TO 1ST COAT DRYWALL RECESSED JOINTS
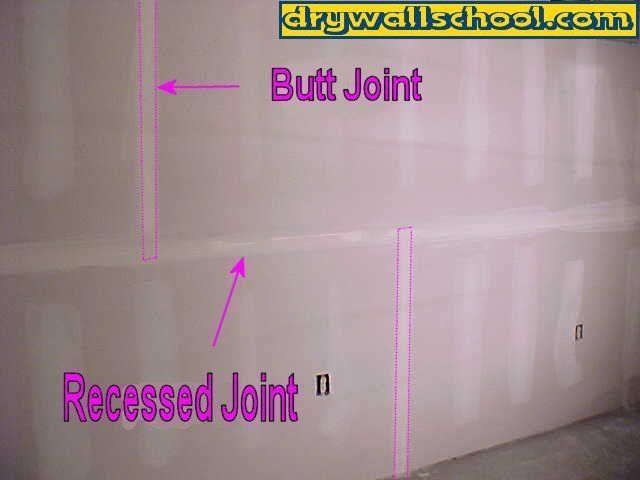
(What's A Recessed Joint??)
The 1st thing you need to know is how this coating stuff works. Sheetrock has a tapered edge on the top and bottom of every sheet. When you're coating, these tapered edges are called "Recessed Joints". The purpose of the tapered edge is so there is a cavity for the joint compound (when you are coating). All you are really trying to do is fill up this cavity, so it will be flush. Recessed joints are easy, Always go through your job and coat them 1st. You ready? Let's get started.
STEP 1: Mix mud, Spread
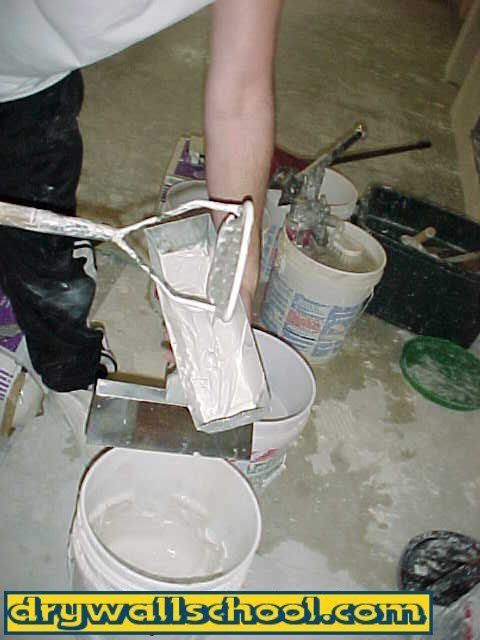
Mix up your joint compound (With water) until it is thin enough to work with. For more on mud and how to mix go here
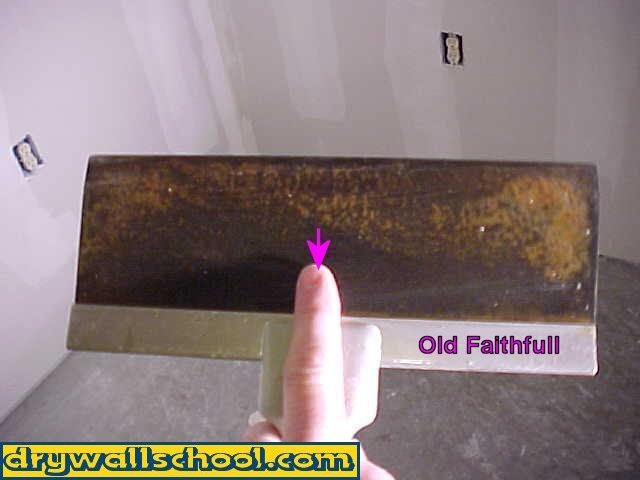
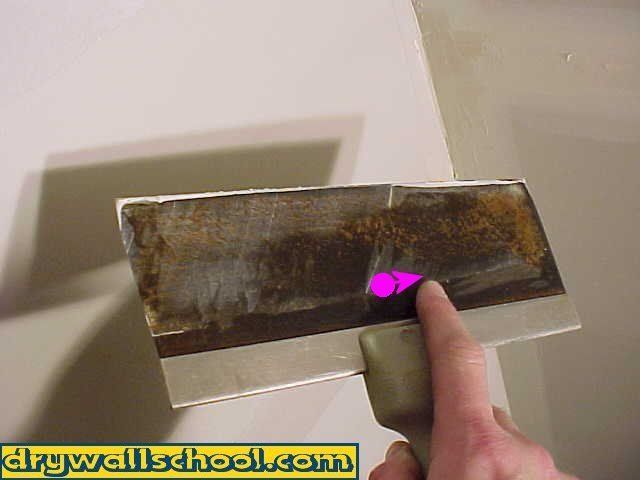
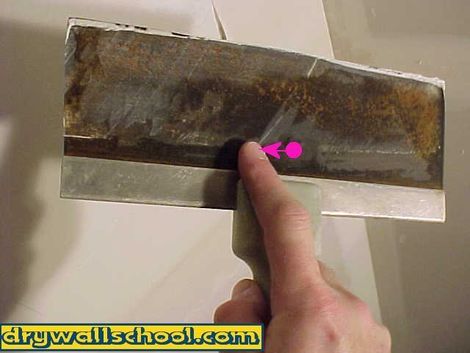
For the 1st coat you will need a 10 inch knife. Always keep your pointer finger in the center of the knife, this will give you more control. Always try to keep the finger side of the knife as dry and clean as possible. Most knives have a logo or something on the handle of one side. I always make the logo side my finger side. Decide what side you want your finger side to be and stick to it. If you're flipping the knife all the time it will get all wet, dirty and sloppy and gross. You want your pointer finger to stay dry.
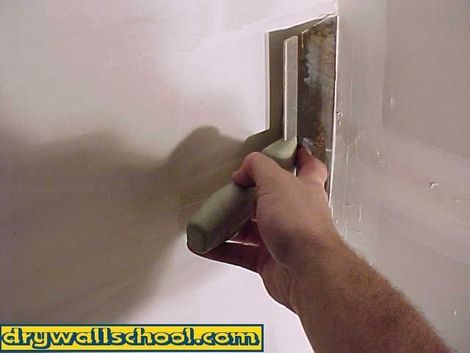
an full of mud and your 10 inch knife, spread a nice even bed of mud on your 1st recessed joint. Start in the corner and come down the wall about 4 to 6 feet. As you get better at this you will be able to bite off bigger sections but for now, just go with nice small easy to manage sized sections.

STEP 2: Feather in the outside edges
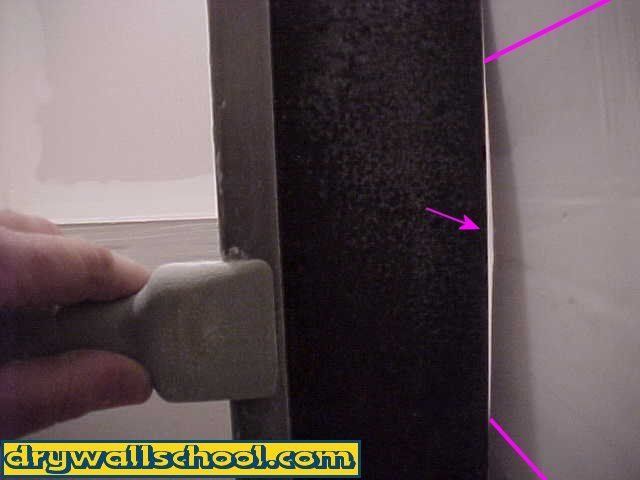
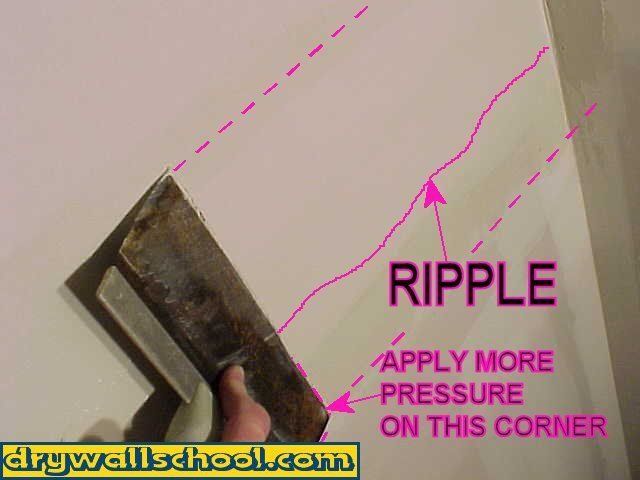
Move your finger a little to the right side of center. This will give you a little more control on the right side of the knife. Start back in the corner and pull the knife back towards you applying most of the preasure on the outside edge. What you're doing here is feathering the outside edge in. You should end up with a small ripple line (See picture).
Once you feathered in the bottom edge, move your finger a little left of center. Pull the knife across the joint again, this time feathering in the top edge. Try to get a ripple line on the top side like you did on the bottom.
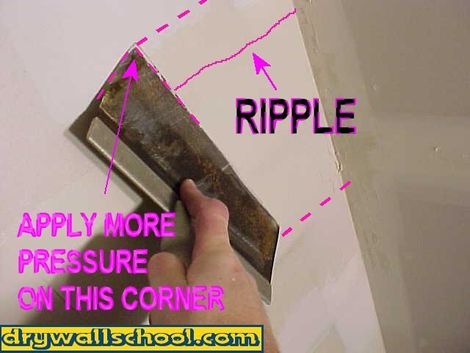
It's hard to get these little ripple lines to show up on a picture but if you look real close at the picture below you can see the top and bottom ripples.
STEP 3: Pull the middle
Place your finger right in the middle of the knife. Pull across the joint one more time, this time using firm even pressure on the middle of the knife. With a little practice you will be able to coat the recessed joints nice and smooth and they will require very little sanding. That should be it for your 1st little section.

Move on to next section
Start at the end of the section you just finished. For the next section you are going to repeat all the steps from above. The only thing you are going to do different is: On your final swipe with your knife you are going to pull from the opposite direction.


When your knife meets the first section you will end up with a small "Lap mark" or "Fish Tail". That's okay, that's what you want. Once you get good at this, the only sanding you will need to do before the 2nd coat is your lap marks and maybe some other minor edges here and there. The picture below is the 1st and 2nd sections coated and a small lap mark where the 2 meet.


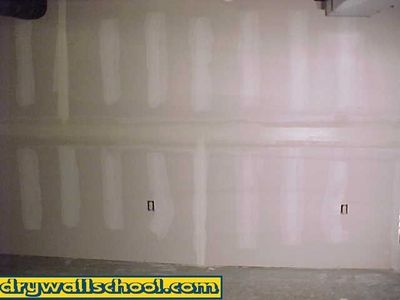
That is how to 1st coat recessed joints. Work your way around the room doing managable sized sections. The only real sanding should be where all your lap marks are. The picture below is one recessed joint totally 1st coated.
Next Step: How To 1st Coat Butt Joints
How about a free video to really help you out ??
This one shows how to coat ceiling joints